Hi guys,
Couple of weeks ago I had the chance to provision the new Web Application Proxy role and ADFS v3 on Windows Server 2012 R2. One of my clients wanted to expose their Intranet for external access. Initially I thought about exposing it using SAML, but because they have lots of BI reports using Excel Services and Reporting Services, migrating to SAML would break these solutions. Simply because Claims would need to be converted to Windows authentication. This article explains really well the BI caveats.
To get this working seamlessly, Kerberos comes up. By using Kerberos the backend doesn’t need to be changed. This is what I wanted.
I was looking at the web for resources about implementing WAP, ADFS and SP2013 on Kerberos and found nothing, but if you want to implement SAML, then you will find lots of stuff. Share-n-dipity is your blog for that.
My scenario comprises 2 web sites, Portal, which is a publishing site, and MySite, as the name suggests a mysite host site.
Because users will be allowed to connect from the internal network and from the internet, I have decided to only have the Default zone in use, of course running on a single HTTPS URL. The diagram below displays how users connect to the sites:

Figure 1 – Site Configuration
In my lab I have provisioned some servers to have specific roles, all of them on Windows Server 2012 R2, except SP2013 on Windows Server 2012 (it could be Windows Server 2012 R2 if you run SP2013 SP1). Anyways, below is my server/network diagram:
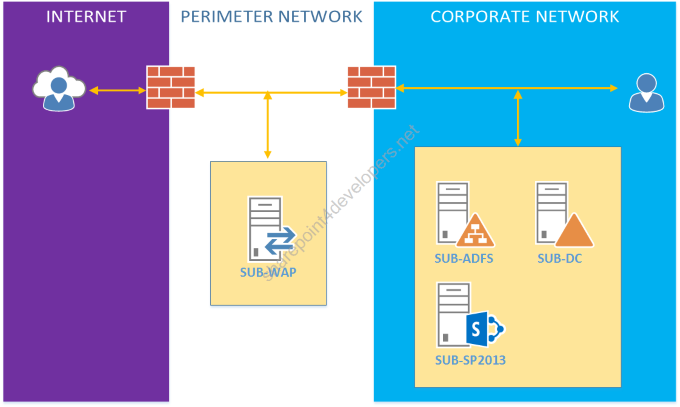
Figure 2 – Server/Network Diagram
Where:
- SUB-SP2013 – SharePoint environment (3-tier, stand-alone, whatever)
- SUB-DC – Active Directory Domain Services (Domain Controller and DNS)
- SUB-ADFS – Active Directory Federation Services (same or different server of DC)
- SUB-WAP – Web Application Proxy
What needs to happen here is described in in the following steps.
Step 1 - Configure DNS
1) On SUB-DC, open the DNS manager and create the following A records:
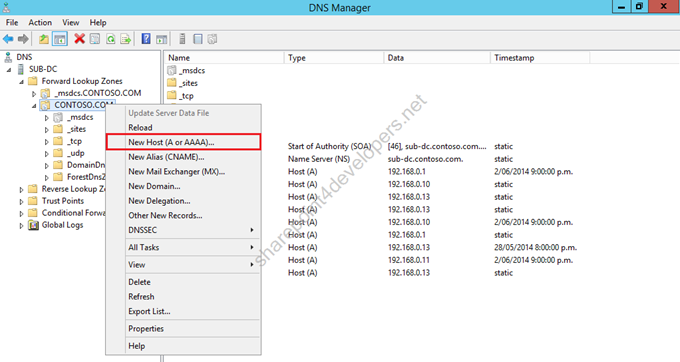
Figure 3 – DNS Manager
(Both referencing the SharePoint 2013 Server IP Address)
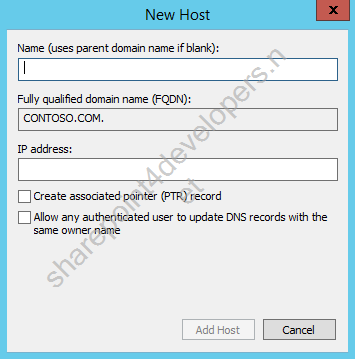 Figure 4 – A-record host
Step 2 - Configure access to certificate
1) On SUB-SP2013, open the Command, run mmc and add the Certificates snap-in, select computer account.
2) Allow the SharePoint site app pool to have Read access on the certificate private keys.
 Figure 5 – Managing Private Keys
 Figure 6 – Allow Read access by App Pool
Step 3 - Configure the SPNs and Constrained Delegation
1) Open the Command prompt, run the following commands:
Portal
setspn –s http/portal.contoso.com contoso\spapppool
setspn –s http/portal contoso\spapppool
MySite
setspn –s http/mysite.contoso.com contoso\spapppool
setspn –s http/mysite contoso\spapppool
2) On SUB-DC, go to Active Directory Users and Computers, find the WAP server:
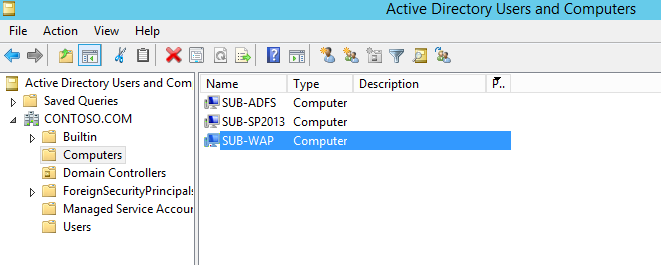 Figure 7 – Active Directory Users and Computers
3) Double-click, then on the Delegation tab tick "Trust this computer for delegation to specified services only" and "Use any authentication protocol". Then add the service account by clicking the Add button.
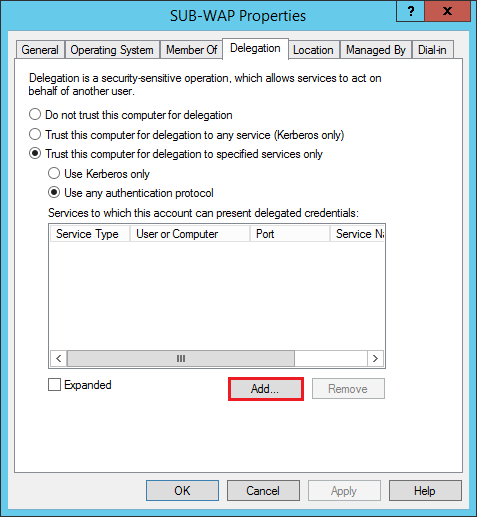 Figure 8 – Add Delegation
4) Make sure you reference the account contoso\spapppool, which contains the SPNs. Select All services returned.
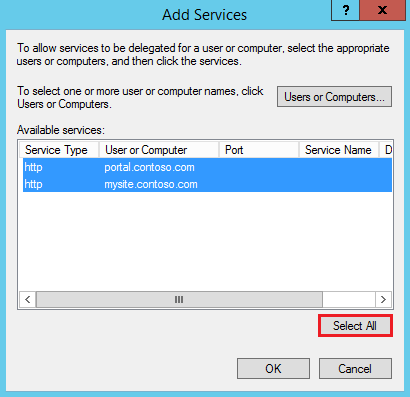 Figure 9 – Select All Delegation
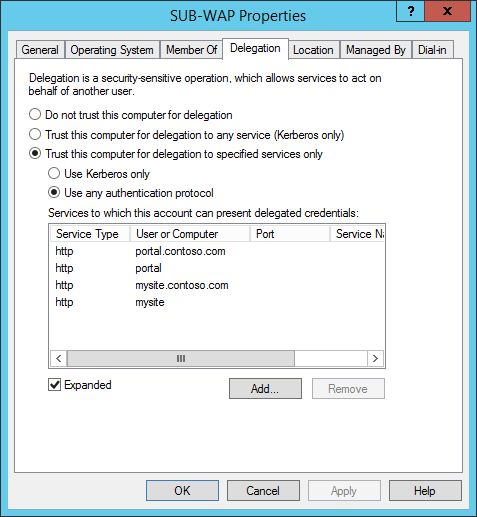 Figure 10 – Delegation Configured
Step 4 - Configure SharePoint sites on Kerberos
1) On SUB-SP2013, go to Central Admin > Manage web applications.
2) Select the website Portal and click Authentication Providers.

Figure 11 – Manage web applications
3) On the Authentication Providers, select the Default zone.
 Figure 12 – Default zone
4) Switch the Integrated Windows authentication to Negotiate (Kerberos).
 Figure 13 – Switching to Kerberos
5) Repeat the same on MySite.
Step 5 - Configure the ADFS Relying parties
1) On SUB-ADFS, open the AD FS Management.
2) On Relying Party trusts, click to Add a Non-Claims-Aware Relying Party Trust:
 Figure 14 – Relying Party Trust
3) The Wizard starts, click Start.
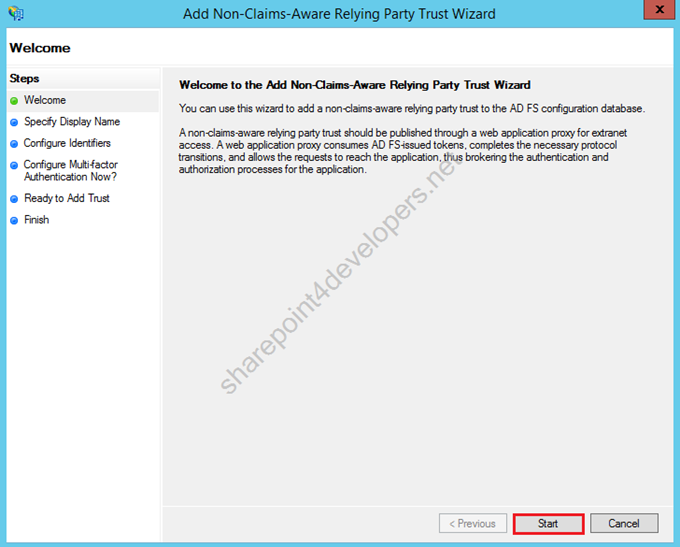 Figure 15 – Non-Claims-Aware Relying Party Trust Wizard
4) In the display name, type Portal, then click Next.
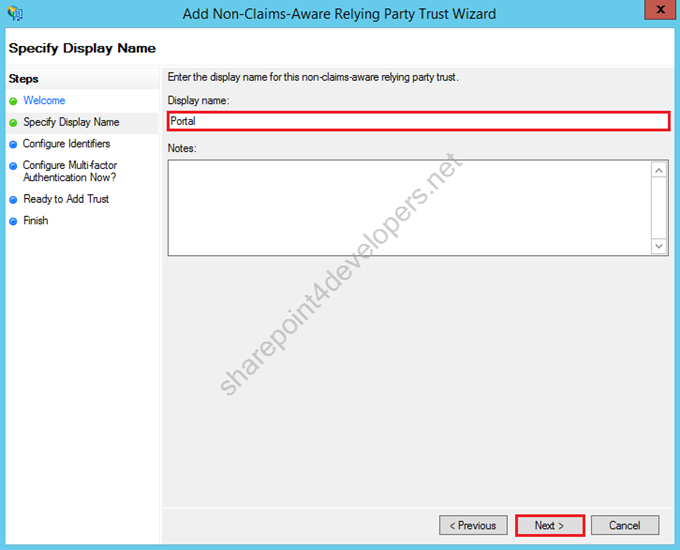 Figure 16 – Non-Claims-Aware Relying Party Trust Wizard – Display Name
5) As the identifier, define the URL https://portal.contoso.com, click Add.
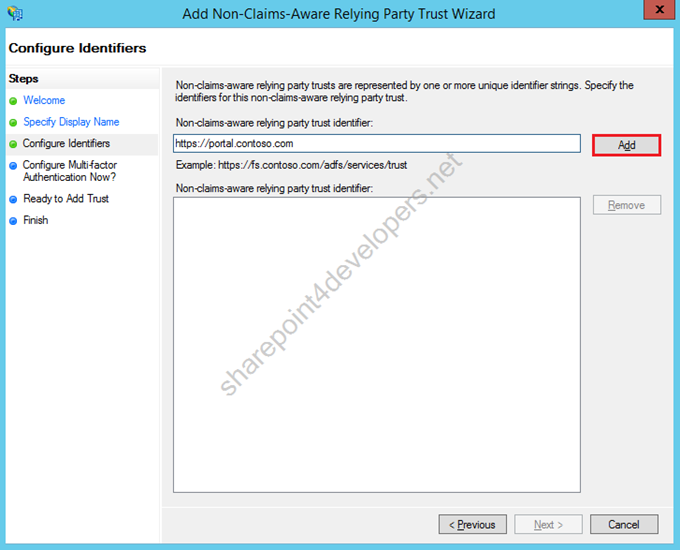 Figure 17 – Non-Claims-Aware Relying Party Trust Wizard – Identifier
6) Continue, click Next.
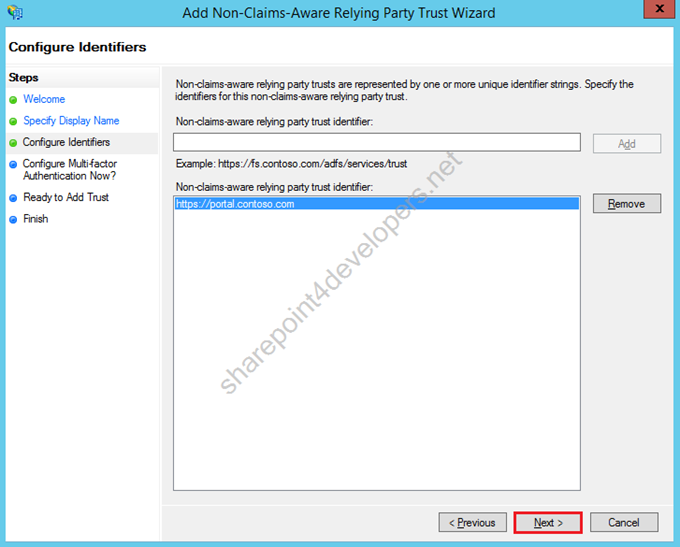 Figure 18 – Non-Claims-Aware Relying Party Trust Wizard - Identifier
7) In my lab I am sticking to the default values, click Next.
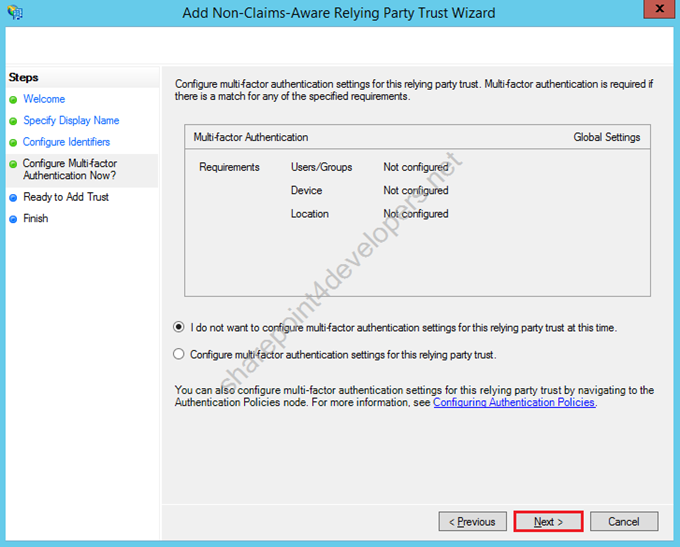 Figure 19 – Non-Claims-Aware Relying Party Trust Wizard – Multi-factor Auth
8) This is the second last screen to confirm what you have done, click Next.
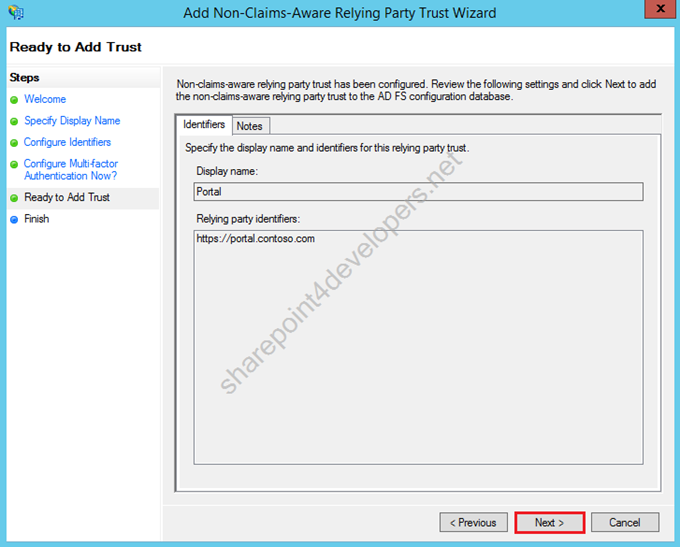 Figure 20 – Non-Claims-Aware Relying Party Trust Wizard – Confirmation
9) Let the standard checkbox ticked, click Close.
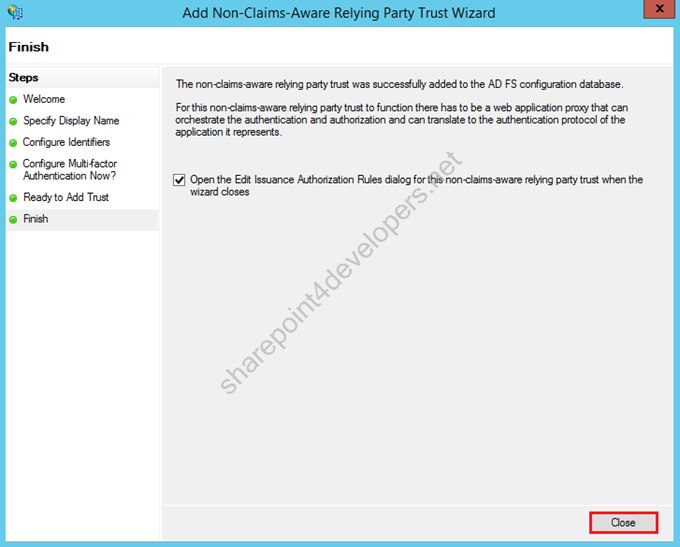 Figure 21 – Non-Claims-Aware Relying Party Trust Wizard – Finish
10) Now you are able to edit the claim rules for Portal, click Add Rule.
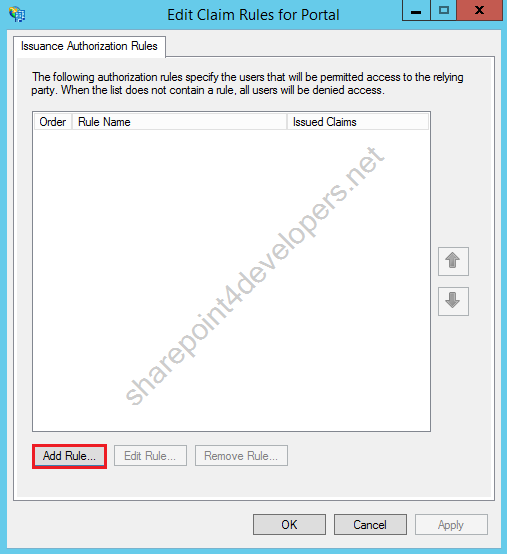 Figure 22 – Edit Claim Rules
11) Select the rule “Permit All Users”, then click Next.
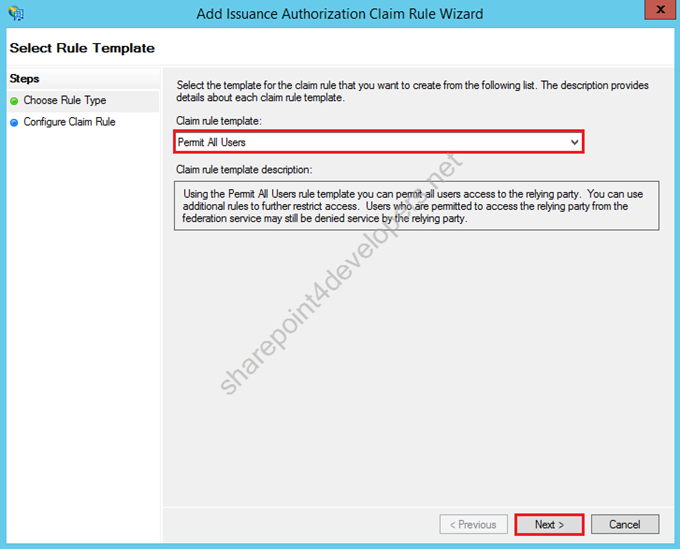 Figure 23 – Add Issuance Authorization Claim Rule Wizard
12) Click Finish.
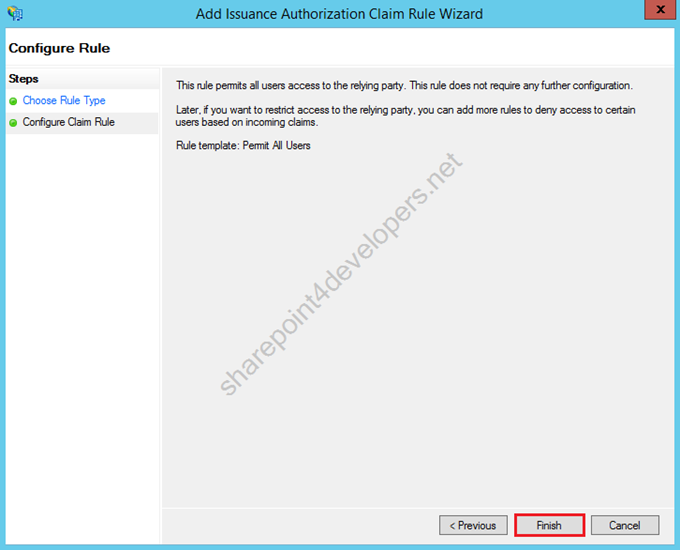 Figure 24 – Add Issuance Authorization Claim Rule Wizard – Finish
13) Then click OK.
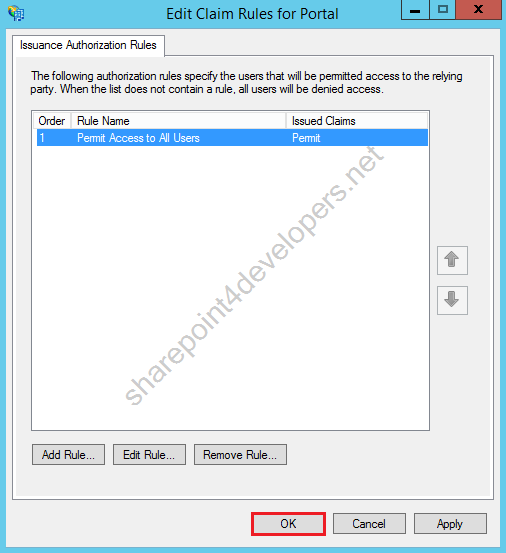 Figure 25 – Edit Claim Rules – Finish
14) Repeat the same process to create a Non-Claims-Aware Relying Party Trust for MySite.
Step 6 - Configure WAP
1) On SUB-WAP, go to Remote Access Management, click Publish.
 Figure 26 – Remote Access Management
2) The Publish New Application Wizard starts, click Next.
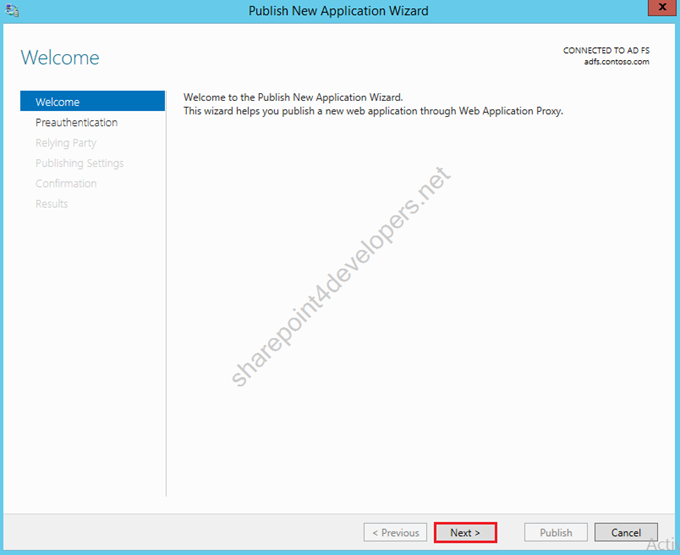 Figure 27 – Publish New Application Wizard
3) As preauthentication mode, let AD FS selected, as it ensures that requests are authenticated first via AD FS.
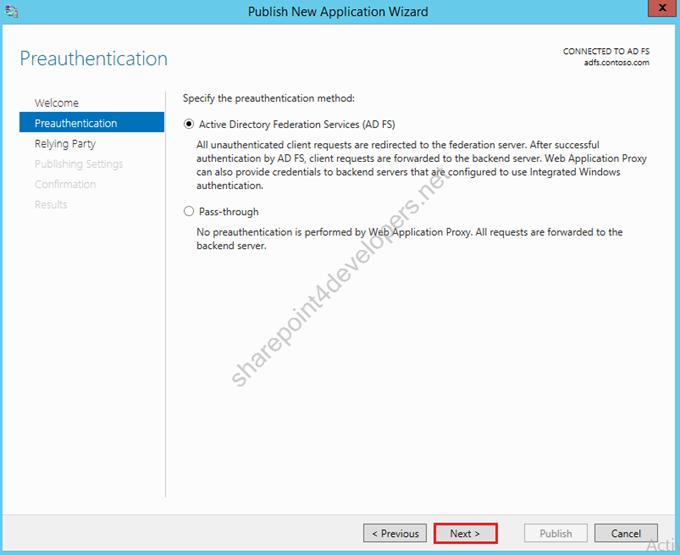 Figure 28 – Preauthentication method
4) Select the Non-Claims-Aware Relying Party Portal, created in the previous step 4, click Next.
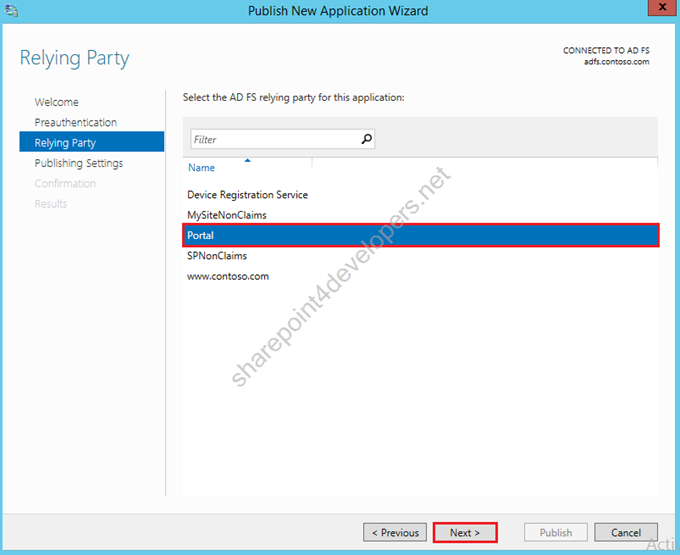 Figure 29 – Select ADFS Relying Party
5) In this screen specify a Name, External URL (https), External Certificate, Backend Server URL and Backend Server SPN (as created in step 3), then click Next.
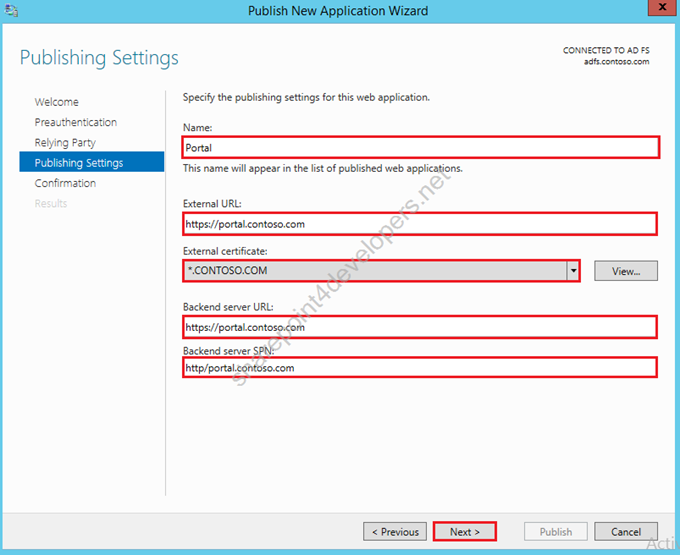 Figure 30 – Publishing Settings
6) Click Publish.
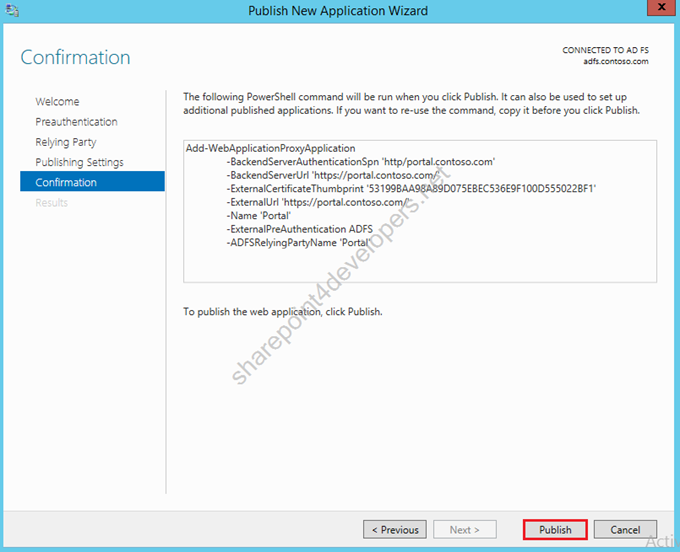 Figure 31 – Publish New Application Wizard – Confirmation
7) Close the Wizard.
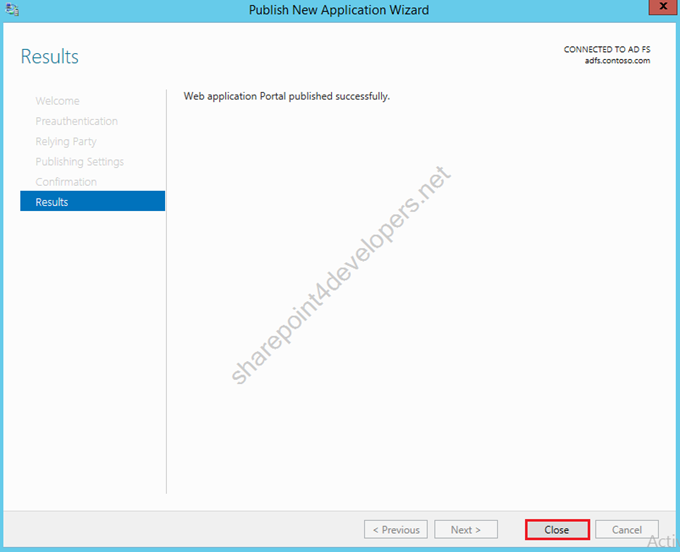 Figure 32 – Publish New Application Wizard – Final
In the end
After the steps executed above you will be able to log in to SharePoint:
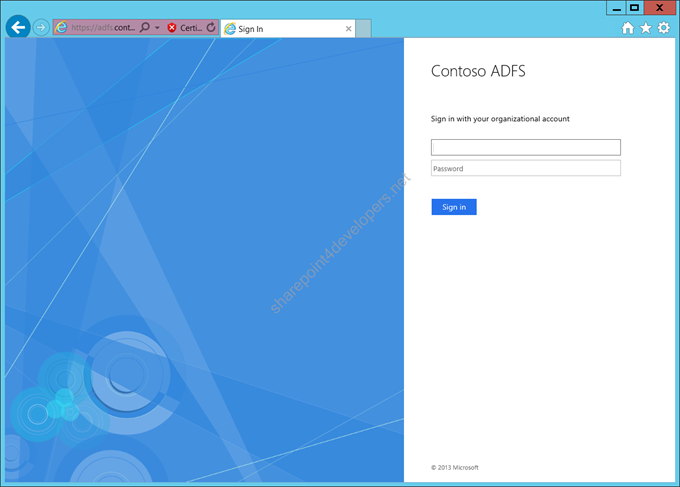 Figure 33 – Proxy Login
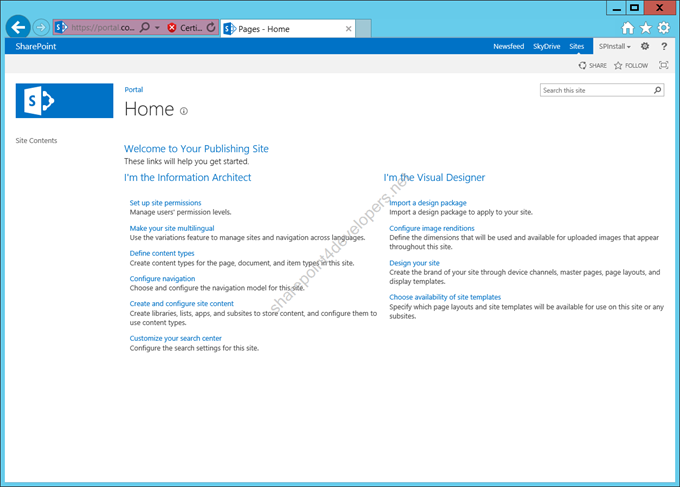 Figure 34 – SharePoint Access
The experience is as smooth as that. :)
Hope you have enjoyed this post. I also hope it helps you.
Let me know if you have questions about any variance that I have not covered here. I may be of help.
Cheers,
Marcel Medina


Click here to read the same content in Portuguese.